

Introduction:
Vector graphics are an important aspect of digital design and illustration. They are made up of mathematical equations that allow images to be scaled and manipulated without losing quality. Vectorizing hand-drawn illustrations is a process of converting a traditional, raster-based illustration into a vector-based one. This process allows for greater flexibility, scalability, and editing capabilities, making it ideal for use in a variety of contexts such as logo designs, product packaging, and more. In this tutorial, we will go through the step-by-step process of vectorizing a hand-drawn illustration, so that you can take your illustrations to the next level.
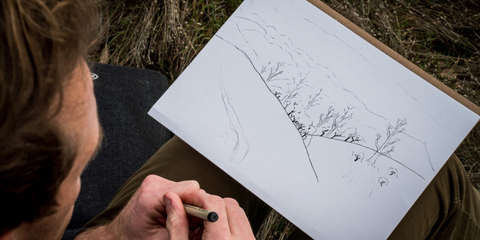
Step 1: Scanning or taking a photo of the illustration:
The first step in vectorizing a hand-drawn illustration is to scan or photograph it. If you are going to scan it, make sure to use a high-resolution setting and scan it at 300 dpi or higher. It is also important to make sure that the illustration is placed flat on the scanner bed, to avoid any distortion or skewing. If you are taking a photo of the illustration, use a high-resolution camera or smartphone and take the photo in good lighting to ensure the best image quality.
If you are using a smartphone, make sure to take the photo straight on to the illustration and avoid any angles or skewing. Once you have your scanned or photographed image, it's time to move on to the next step and clean it up.
Step 2: Cleaning up the image:
After scanning or taking a photo of the illustration, the next step is to clean up any imperfections in the image. This can be done using editing software such as Adobe Photoshop.

Start by cropping the image to remove any unwanted background or edges. Then, use the clone stamp tool or the healing brush tool to remove any smudges, wrinkles or other imperfections on the illustration. You can also adjust the brightness, contrast, and color balance to make sure the image is as clear as possible.
If the image has a lot of noise or grain, you can use the noise reduction filter or the blur filter to smooth out the texture. It's important to be mindful of preserving the overall look and feel of the illustration while cleaning it up. Once you are satisfied with the cleaned-up image, it's ready to be traced in vector editing software in the next step.
Step 3: Tracing the image:
The next step in vectorizing a hand-drawn illustration is to trace the image using vector editing software. Adobe Illustrator is one of the most popular options, but there are other software options available as well such as Inkscape, CorelDRAW, and Affinity Designer.
Once you have opened your scanned or photographed image in the vector editing software, you will need to use the "pen" or "pencil" tool to trace over the lines of the illustration. The software will automatically convert the traced lines into vector paths. You can also use the "live trace" or "autotrace" feature in some software to automatically vectorize the image, but this method may not provide as much control and precision as manually tracing the image.
It's important to pay attention to the details and make sure that all the lines are clean and accurate. Take your time and don't rush through this step, as it will affect the final result. Once you have traced the image, you can move on to the next step and fine-tune the vectorized illustration.
Step 4: Fine-tuning the vector image: After tracing the image, the final step is to fine-tune the vectorized illustration. This is where you can make adjustments to the paths, shapes, and colors to create a polished final product.
Start by using the "direct select" tool to adjust the positions and shapes of the vector paths. Use the "pen" or "pencil" tool to add or delete any paths as needed. Make sure to pay attention to the details and ensure that the illustration looks as close as possible to the original hand-drawn version.
Next, use the color tools to add and adjust colors in the illustration. You can use the "color picker" tool to match the colors of the original illustration or choose new colors to give the vectorized illustration a different look. You can also use the "gradient" and "pattern" tools to add more depth and texture to the illustration.
Finally, once you're satisfied with the final result, you can export the illustration as a high-resolution file, such as an .eps or .svg file, which can be used for print or digital applications.
Remember that vectorizing an illustration is not a one-step process, and it may take some time and practice to master it. But with patience and attention to detail, you'll be able to create vector illustrations that are clean, precise, and ready for any application.
Conclusion:
Vectorizing hand-drawn illustrations is a powerful way to take your artwork to the next level. It allows for greater flexibility, scalability, and editing capabilities, making it ideal for use in a variety of contexts such as logo designs, product packaging, and more. By following the steps outlined in this tutorial, you should now have a better understanding of how to scan or photograph a hand-drawn illustration, clean it up, trace it, and fine-tune it into a polished vectorized illustration.
Vectorizing illustrations may require effort and practice to perfect, but with a steady hand and attention to detail, the end result can be highly polished vector illustrations that are versatile and ready for any kind of use.
Don't be afraid to experiment and try different techniques to find what works best for you. And remember that vectorizing illustrations is not a one-time process, you can always go back and edit it, making it a powerful tool for any Illustrator or Graphic designer.
In conclusion, vectorizing hand-drawn illustrations is a valuable skill that can open up a whole new world of possibilities for your artwork. Give it a try and see how it can enhance your illustrations and designs.
Bonus: Tips and best practices:
-
Always scan or photograph your illustration at a high resolution. The higher the resolution, the better quality your final vectorized illustration will be.
-
Take your time when tracing the image. Make sure to pay attention to the details and ensure that the illustration looks as close as possible to the original hand-drawn version.
-
Use the appropriate tools for the job. Different vector editing software have different tools, make sure to use the one that is most appropriate for the task.
-
Experiment with different techniques. Vectorizing is not a one-size-fits-all process, and different illustrations may require different techniques.
-
Use layers to keep your work organized. Layers allow you to separate different elements of the illustration and make it easier to edit and make changes.
-
Save your work frequently. Vectorizing can be a time-consuming process, and you don't want to lose your progress in case something goes wrong.
-
Don't be afraid to ask for help. If you're having trouble with a particular step or technique, don't hesitate to reach out to more experienced designers or illustrators for guidance.